Run Wordpress on Ubuntu using Terraform, Ansible and Docker
Preface
If you’ve ever installed Wordpress from scratch, you know what a challenge it can be. I wanted to make installing Wordpress a bit easier and to do that, I thought I’d try to wrap the whole process around more automation.
I ended up using a few different tools to get the job done. As you will see below, there are many options for making things easier.
This article will demonstrate how to use:
- Terraform to provision an Ubuntu virtual machine.
- Ansible to install prerequisites and Docker on the host vm.
- Docker to spin up containerized Wordpress infrastructure including Apache, MySQL and PHP.
Using Terraform for Fast, Immutable VMs
Terraform is an excellent tool tool. It allows users to quickly provision and configure a vast range of infrastructure. For this article, we’ll be using Terraform to provision a Ubuntu virtual machine in VMWare Vsphere. In order to do this, there must be a pre-configured VM template in Vsphere that can be used to create VMs from. To do this I created a minimal Ubuntu VM with the following attributes:
- 1 vCPUs
- 1 GB RAM
- 16 GB hdd thin-provisioned
- Dynamic IP v4 settings
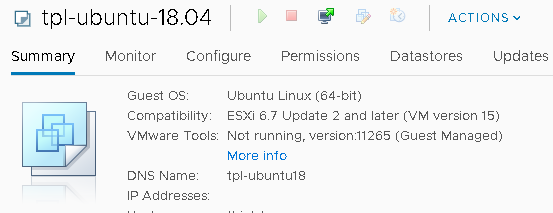
- Hostname: tpl-ubuntu18
This was enough to install a minimal Ubuntu 18.04 OS. The only package I added was the optional OpenSSH server to I could access the VM outside the VMWare console.
I also added an SSH public key so I could shell in without supplying a password. Besides being convenient, it is also necessary for Ansible to connect to any VMs cloned from the template later.
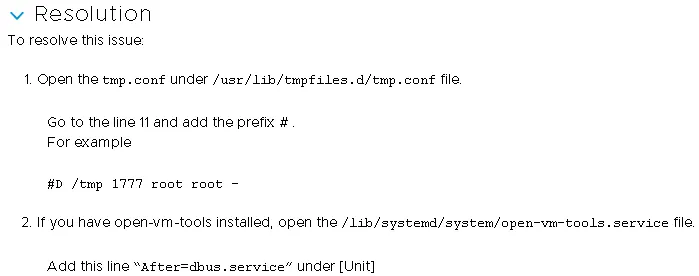
There is a bug with the open-vm-tools package for Ubuntu 18.04 that prevents guest customization from working correctly. To resolve this issue as described in this VMWare KB article ( https://kb.vmware.com/s/article/56409 ), I commented out a line in /usr/lib/tmpfiles.d/tmp.conf and added another in /lib/systemd/system/open-vm-tools.service.
After running updates, I converted the VM to a template:
Using Terraform to provision the VM
Once I had a VM template in Vsphere, I could use Terraform to create a VM. Managing VMs this way has many advantages:
- Allows an arbitrary number of identical VMs to be quickly provisioned.
- VMs can be destroyed just as quickly. This is especially useful when practicing something new or developing anything related to Infrastructure as Code.
- Resources can be modified as code. For example, adding memory or another vCPU to a VM is as simple as modifying code and applying the change.
- VMs can be re-created the same way eliminating the ‘snowflake’ effect of doing it manually.
- The template itself can be patched and updated as needed.
- Changes to the VMs or any other infrastructure can be predicted and planned using ‘dry-run’ techniques. For example, Terraform has a ‘plan’ mode that tells you what will be done before any action it taken.
- Since the definition of infrastructure is now code, it can be linted, tested and version-controlled.
To get started, I needed to declare the use of the Vsphere provider. Here’s the contents of the main.tf file:
provider "vsphere" {
  user           = var.vsphere_user
  password       = var.vsphere_password
  vsphere_server = var.vsphere_server

  # If you have a self-signed cert
  allow_unverified_ssl = true
}
Next, I created a separate file for variables. These variable are common to my environment, and not specific to any VM. I called this file variables.tf.
variable "vsphere_user"{
    type = string
    default = "***************"
}

variable "vsphere_password"{
    type = string
    default = "***************"
}

variable "vsphere_server"{
    type = string
    default = "***************"
}

variable "vsphere_datacenter"{
    type = string
    default = "***************"
}

variable "vsphere_datastore"{
    type = string
    default = "***************"
}

variable "vsphere_vm_network"{
    type = string
    default = "***************"
}

variable "vsphere_cluster" {
  type = string
    default = "***************"
}

variable "network_domain"{
    type = string
    default = "***************"
}

variable "dns_servers"{
    type = list(string)
    default = "***************"
}

variable "default_gateway" {
    type = string
    default = "***************"
}

variable "netmask" {
    type = number
    default = 24
}
Note that in the example above, it’s not advisable to store credentials in source code. These should be stored in the environment or in a secret store such as Hashicorp Vault. The above is only used for this oversimplified example.
The last piece of the Terraform puzzle was to write a block of code to create and manage the actual VM:
data "vsphere_datacenter" "dc" {
  name = "${var.vsphere_datacenter}"
}

data "vsphere_datastore" "datastore" {
  name          = "${var.vsphere_datastore}"
  datacenter_id = "${data.vsphere_datacenter.dc.id}"
}

data "vsphere_compute_cluster" "cluster" {
  name          = "${var.vsphere_cluster}"
  datacenter_id = "${data.vsphere_datacenter.dc.id}"
}

data "vsphere_network" "network" {
  name          = "${var.vsphere_vm_network}"
  datacenter_id = "${data.vsphere_datacenter.dc.id}"
}

data "vsphere_virtual_machine" "template" {
  name          = "tpl-ubuntu-18.04"
  datacenter_id = "${data.vsphere_datacenter.dc.id}"
}

resource "vsphere_virtual_machine" "vm" {
  name             = "wordpress.test.local"
  resource_pool_id = "${data.vsphere_compute_cluster.cluster.resource_pool_id}"
  datastore_id     = "${data.vsphere_datastore.datastore.id}"

  num_cpus = 2
  memory   = 4096
  guest_id = "${data.vsphere_virtual_machine.template.guest_id}"

  scsi_type = "${data.vsphere_virtual_machine.template.scsi_type}"

  network_interface {
    network_id = "${data.vsphere_network.network.id}"
    adapter_type = "${data.vsphere_virtual_machine.template.network_interface_types[0]}"
  }

  disk {
    label = "disk0"
    size             = "${data.vsphere_virtual_machine.template.disks.0.size}"
    eagerly_scrub    = "${data.vsphere_virtual_machine.template.disks.0.eagerly_scrub}"
    thin_provisioned = "${data.vsphere_virtual_machine.template.disks.0.thin_provisioned}"
  }
  clone {
    template_uuid = "${data.vsphere_virtual_machine.template.id}"

    customize {
      linux_options {
        host_name = "wordpress"
        domain    = "${var.network_domain}"
      }

      network_interface {
        ipv4_address = "10.0.1.38"
        ipv4_netmask = "${var.netmask}"
      }

      ipv4_gateway = "${var.default_gateway}"
      dns_server_list = "${var.dns_servers}"
    }
  }
}
Note that many of the inputs to this file are references to the contents of the variables.tf file discussed above. Note also that the template name corresponds to the VM template for the Ubuntu VM template I created in the previous step.
To create a VM from all this, it is minimally necessary to run just two Terraform commands:
terraform plan
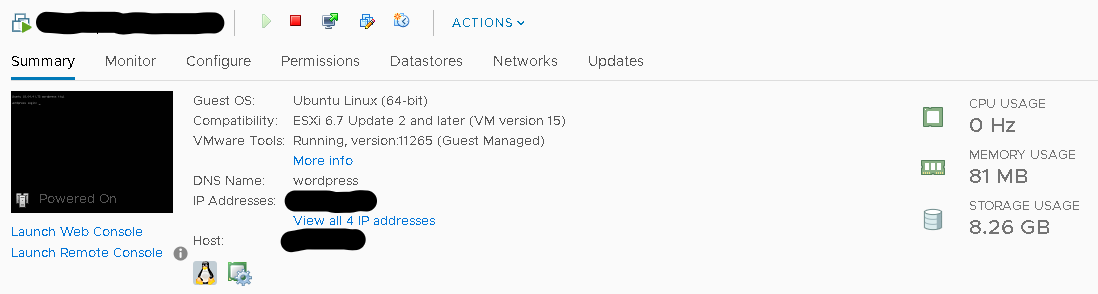
terraform applyI wound up with a VM that was cloned from my template:
Using Anible to install Docker
I’ve found an easy way to deploy Wordpress using Docker. However, installing Docker manually is an error-prone pain. I wanted to find an easier and more reliable/consistent way to to it.
Using Ansible and Jeff Geerling’s excellent Ansible Galaxy playbook for this worked reall.y well.
On a separate machine that I had configured to be an Ansible Control node, I ran this to install the Galaxy Docker playbook:
ansible-galaxy install geerlingguy.dockerThen, I created a simple Ansible Inventory file entry to reference the VM on which I’d ultimately install Wordpress:
wordpress.test.localNext, I defined a simple playbook to perform the work of installing Docker on the Wordpress VM:
---
    - hosts: wordpress-servers
      become: true

      vars:
        docker_install_compose: true
        docker_compose_version: "1.24.1"
        docker_compose_path: /usr/local/bin/docker-compose
        docker_apt_release_channel: stable
        docker_apt_arch: amd64
        docker_apt_repository: "deb [arch={{ docker_apt_arch }}] https://download.docker.com/linux/{{ ansible_distribution|lower }} {{ ansible_distribution_release }} {{ docker_apt_release_channel }}"
        docker_apt_ignore_key_error: True

      roles:
        - geerlingguy.docker
Executing this playbook was extremely simple:
ansible-playbook -K -i hosts wordpress.ymlThe result was that Ansible remotely installed Docker on the target host without a hitch. Pretty neat!
Once complete, I SSH’ed into the Wordpress VM. For convenience, I added my account to the Docker group so that I could run Docker commands without sudo:
sudo usermod -aG docker $USERDeploying Wordpress using Docker Compose
Next, I defined a Docker Compose file that would install Wordpress for me. I got this file from the official Wordpress Docker Hub page:
version: '3.1'

services:

  wordpress:
    image: wordpress
    restart: always
    ports:
      - 8080:80
    environment:
      WORDPRESS_DB_HOST: db
      WORDPRESS_DB_USER: exampleuser
      WORDPRESS_DB_PASSWORD: examplepass
      WORDPRESS_DB_NAME: exampledb
    volumes:
      - wordpress:/var/www/html

  db:
    image: mysql:5.7
    restart: always
    environment:
      MYSQL_DATABASE: exampledb
      MYSQL_USER: exampleuser
      MYSQL_PASSWORD: examplepass
      MYSQL_RANDOM_ROOT_PASSWORD: '1'
    volumes:
      - db:/var/lib/mysql

volumes:
  wordpress:
  db:
Once I saved this file as docker-compose.yml, I executed docker-compose against it via the following command:
docker-compose up -dAfter a few minutes, the command exited. To tell what the command did, I performed some verification steps. I looked at:
- what images the Compose file pulled down.
- What volumes were created
- what ports were exposed
xxx@wordpress:~$ docker image ls
REPOSITORY          TAG                 IMAGE ID            CREATED             SIZE
wordpress           latest              0947f14b932b        2 weeks ago         540MB
mysql               5.7                 c4f186b9e038        2 weeks ago         435MB
xxx@wordpress:~$ docker ps
CONTAINER ID        IMAGE               COMMAND                  CREATED             STATUS              PORTS                  NAMES
55b0a9973f8f        wordpress:latest    "docker-entrypoint.s…"   21 hours ago        Up 3 hours          0.0.0.0:8000->80/tcp   dan_wordpress_1
b2e68230b7a7        mysql:5.7           "docker-entrypoint.s…"   21 hours ago        Up 3 hours          3306/tcp, 33060/tcp    dan_db_1
xxx@wordpress:~$$ docker volume ls
DRIVER              VOLUME NAME
local               04576b665baedd049287321d8be8688ffaa583d4b77d6edf4a03678eb5dc5ab0
local               xxx_db_data
xxx@wordpress:~$
Verification
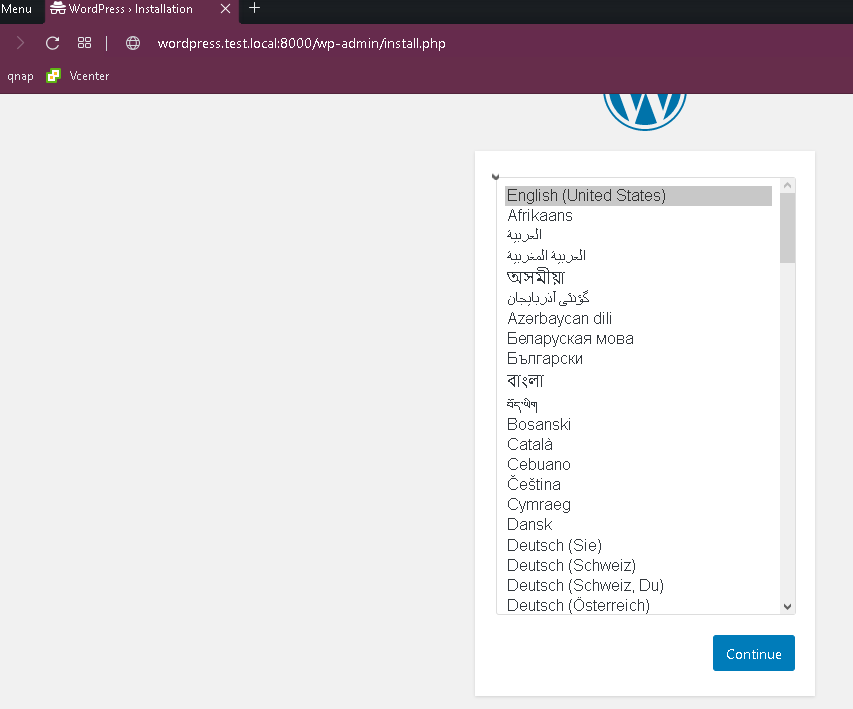
This all looked great! To verify that everything was working, I hit the URL/port that the command had revealed and it worked!
Conclusion
Utilizing technologies such as Terraform, ansible and Docker can save significant amounts of time and create more reliable, predictable and maintainable deployments.
Please comment if you have any questions.